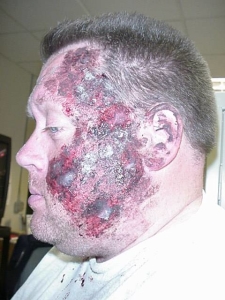
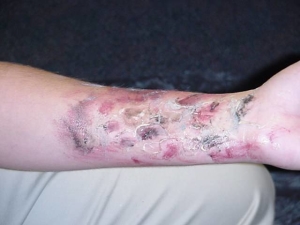
Moulage
mou·lage (noun \mü-ˈläzh\)
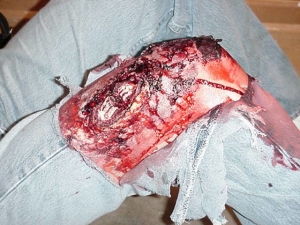
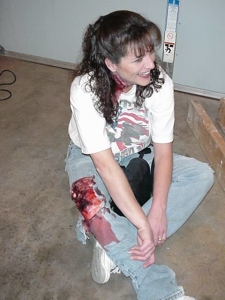
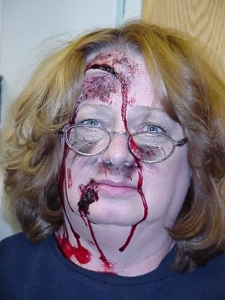
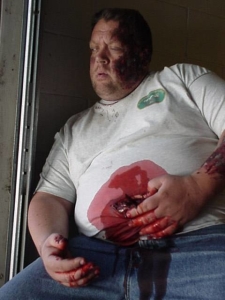
the art of applying mock injuries to simulate real-world experience for emergency medical training
Items to have in moulage kit:
Note: Most come off with soap and water. Get many items at dollar stores, Halloween time is great!
- Cold cream
- Plumbers putty – (comes in green) – Works best when you smear into (toward) the skin instead of upward into clumps.
- Latex glue
- Denture powder and water
- Alka-Seltzer – Used for sucking chest wounds
- Rice – Used for maggots
- Baby oil
- Trauma scissors
- Band-Aids
- Small syringes
- Eye liners – brown and black
- Dropcloths
- Oatmeal packets
- Locate area with no skin creases or areas that you bend at.
- Smear on latex glue in wide area. Note: Do not allow any clothing to rub area of design.
- String out some cotton and stick to glue.
- Place fake broken bone piece on glue area. Press down.
- Tape around all edges with thin, clear medical-type tape.
- Spread plumbers putty around and away from wound edges. Apply thick.
- Add thick blood to cotton area.
- Add more latex glue on top of putty around the bone area. Make sure it dries (looks clear) before proceeding.
- Using a pick tool, make putty look like skin is torn up. This effect takes practice.
- Brush on some bruising colors around the edges of the bone and surrounding area.
- Add some powder bruise coloring.
- Squeeze in thick dark blood.
- Spray with a brighter and smoother blood at end.
- Spread a thick mixture of denture powder and water, make thick enough so it doesn’t drip.
- Using tool, make a slit down the center of fake skin buildup for the area showing a cut.
- Add bruising around the edges and powder on top.
- Work gash wide.
- Squeeze in semi-thick liquid blood.
- Smear as needed.
- Much the same as the broken leg. You do not have to tape down the fake piece you use.
- Can use liquid latex in center of cuts with insert of a small strand of cotton spread through.
- Add thick blood.
- Add thin blood.
- On stomach area, apply liquid latex glue. Allow to completely dry.
- Place impaled object onto skin and tape all edges down with clear thin medical tape.
- Intestines used are actually colored oatmeal in a double-wrapped condom. Add latex glue to one side of oatmeal-filled condom. Let dry.
- Take this and insert over the impaled object, making sure the glue side of oatmeal will touch the stomach once it is placed over the impaled object.
- Spread this in manner of the effect desired.
- Add bruising to the face.
- Apply tacky thick blood in area with Popsicle stick.
- Use ashes from fireplaces to add additional effects over blood. Displays a dirty and charred look.
- Add some petroleum jelly to help with shiny look.
- Apply fairly thick liquid latex glue to the arm area, thick enough to work with.
- Let dry.
- Using a tool, pick up small parts of the latex and roll them back to make it look like it is blistered.
- Add blush for burn effects.
- Add petroleum jelly under some fake skin to look blistery.
- Add ashes sparingly with a Popsicle stick.
Bruises
Use bruise-colored makeup (comes in powders or solid compact). Apply like women’s makeup using painter-type brushes or make-up pads.
Homemade Vomit
Use a single serving package of hot cereal or oatmeal. Tastes great and looks bad!
Scrapes
Using the bruising colors, take a baby bottlebrush and scrape onto skin area.
Nose Soot
Use black powder makeup on a brush and touch up under nose, mouth and eyes for inhalation effect from smoke or explosions, etc.
Thank you to PrepareMetroKC’s CERT Rodeo in a Box for the video and thank you to Pueblo Emergency Response Team through the Pueblo County Department of Emergency Management for the photos and instructions.

